After the Storm Comes the Calm (Inspection): How to Check for Roof Damage
•
Written By
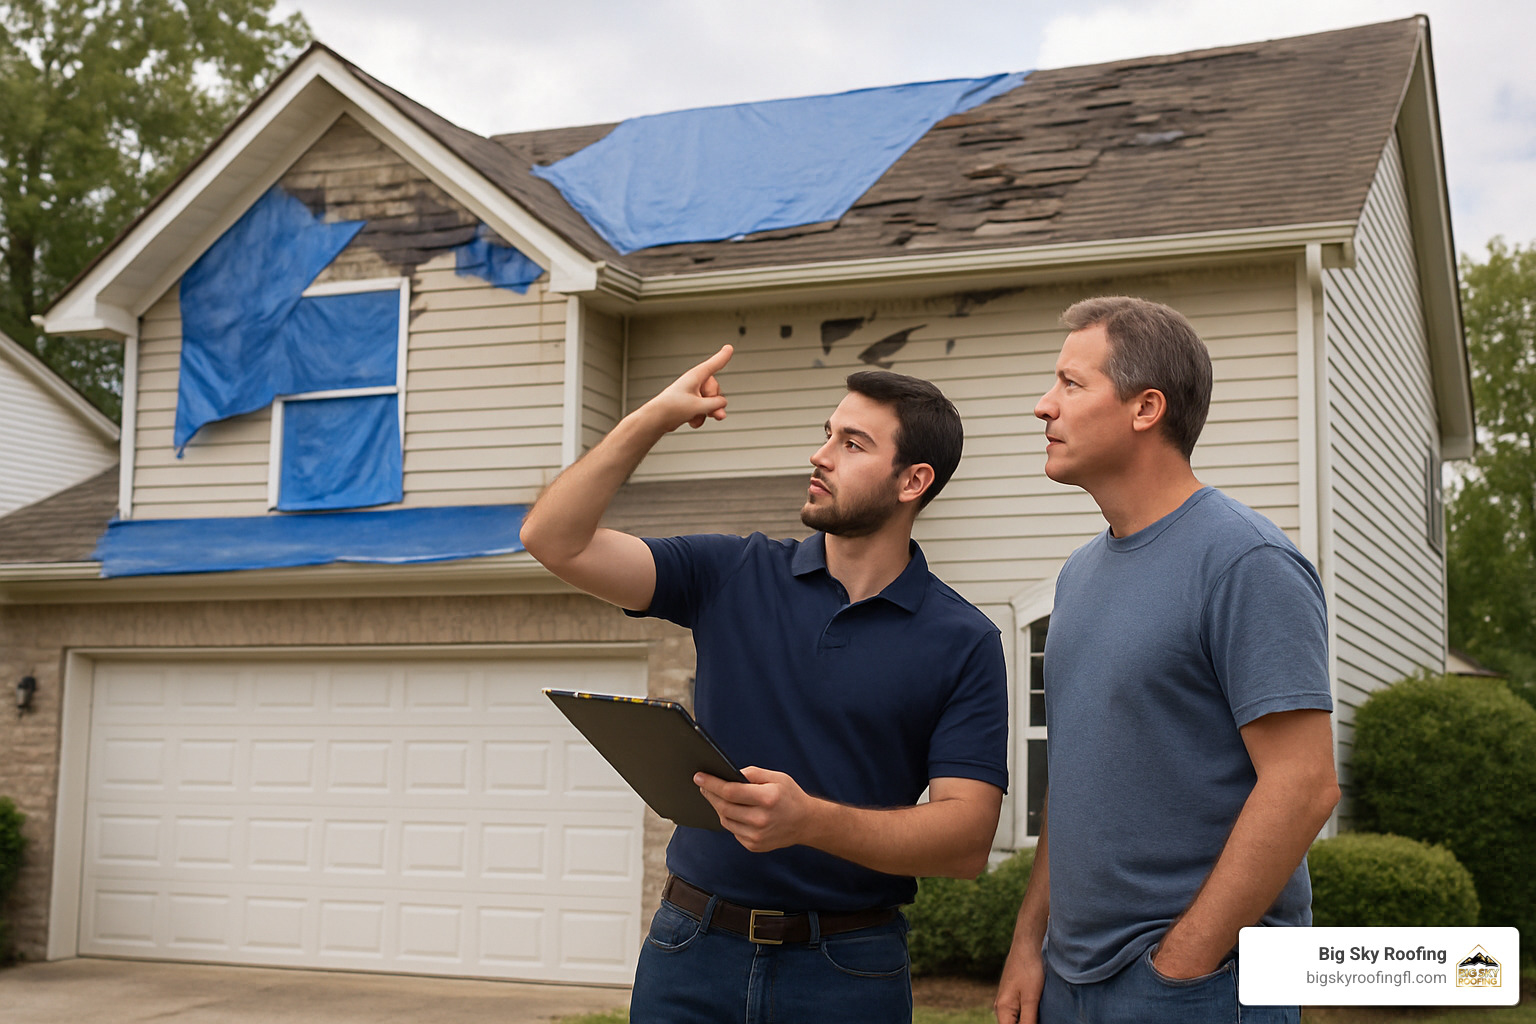
After the Storm: What Happens Next?
How to check for roof damage after a storm is critical knowledge for every Florida homeowner. When severe weather passes, conducting a thorough inspection can save you thousands in preventable repairs.
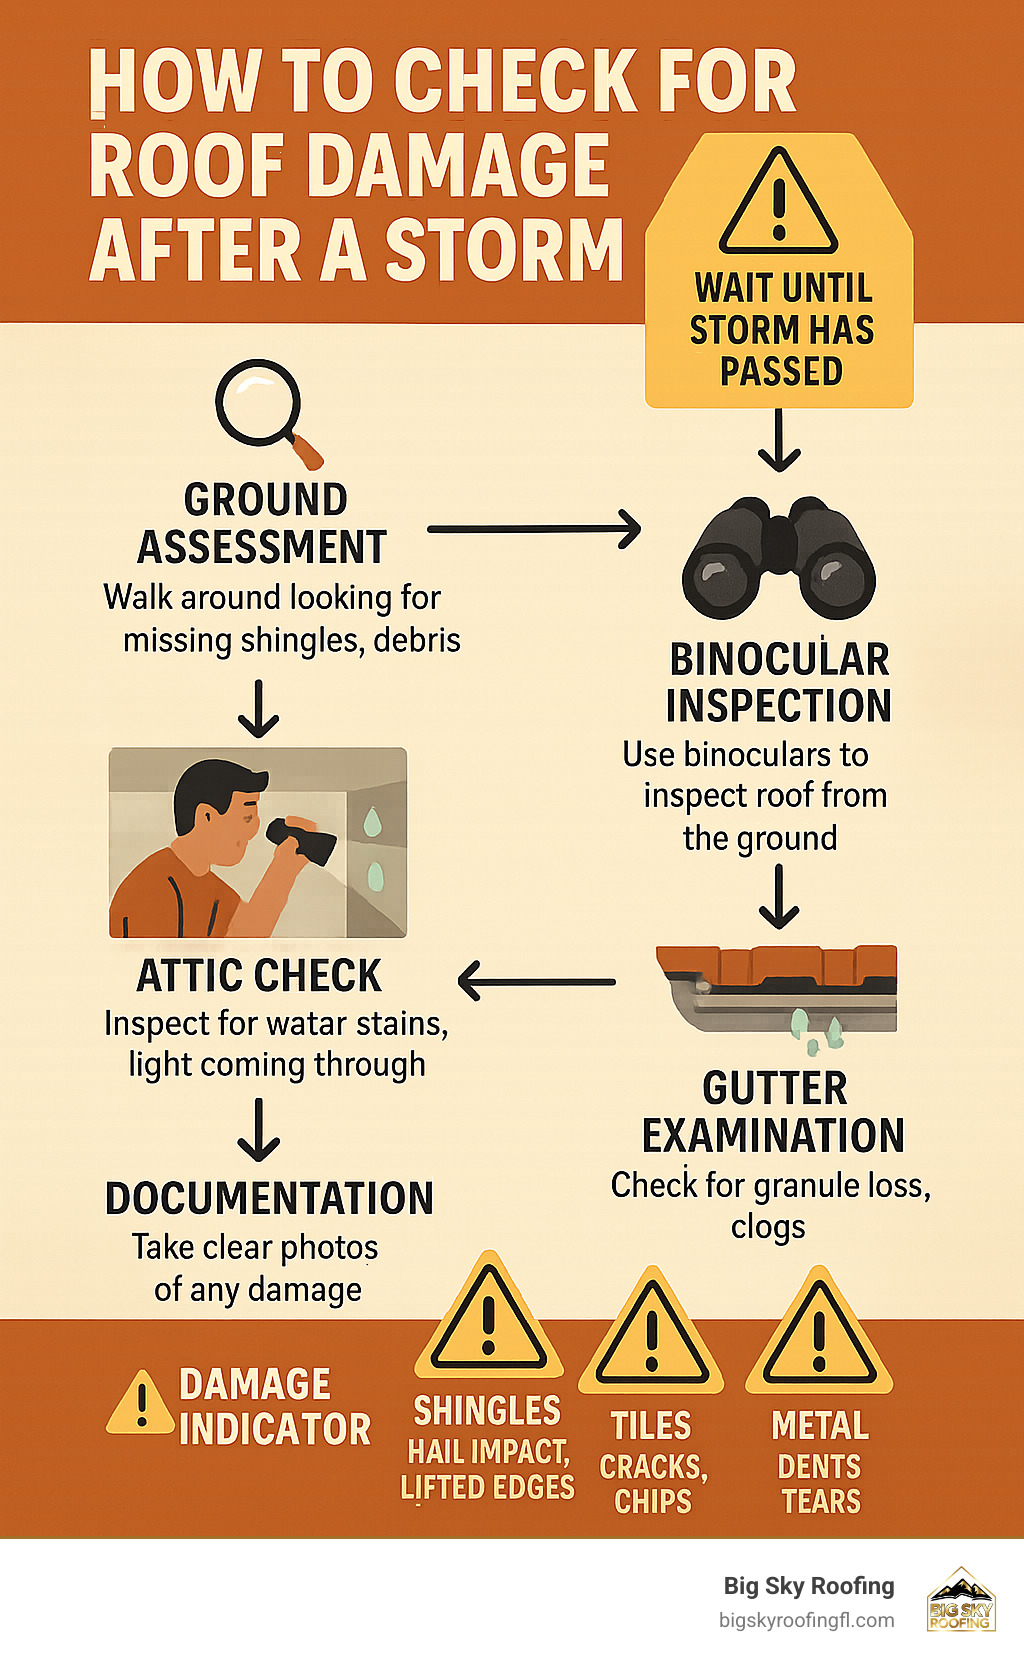
Quick Guide: Checking for Roof Damage After a Storm
- Safety first: Wait until storm has completely passed
- Ground inspection: Walk perimeter looking for missing shingles, debris, granules in gutters
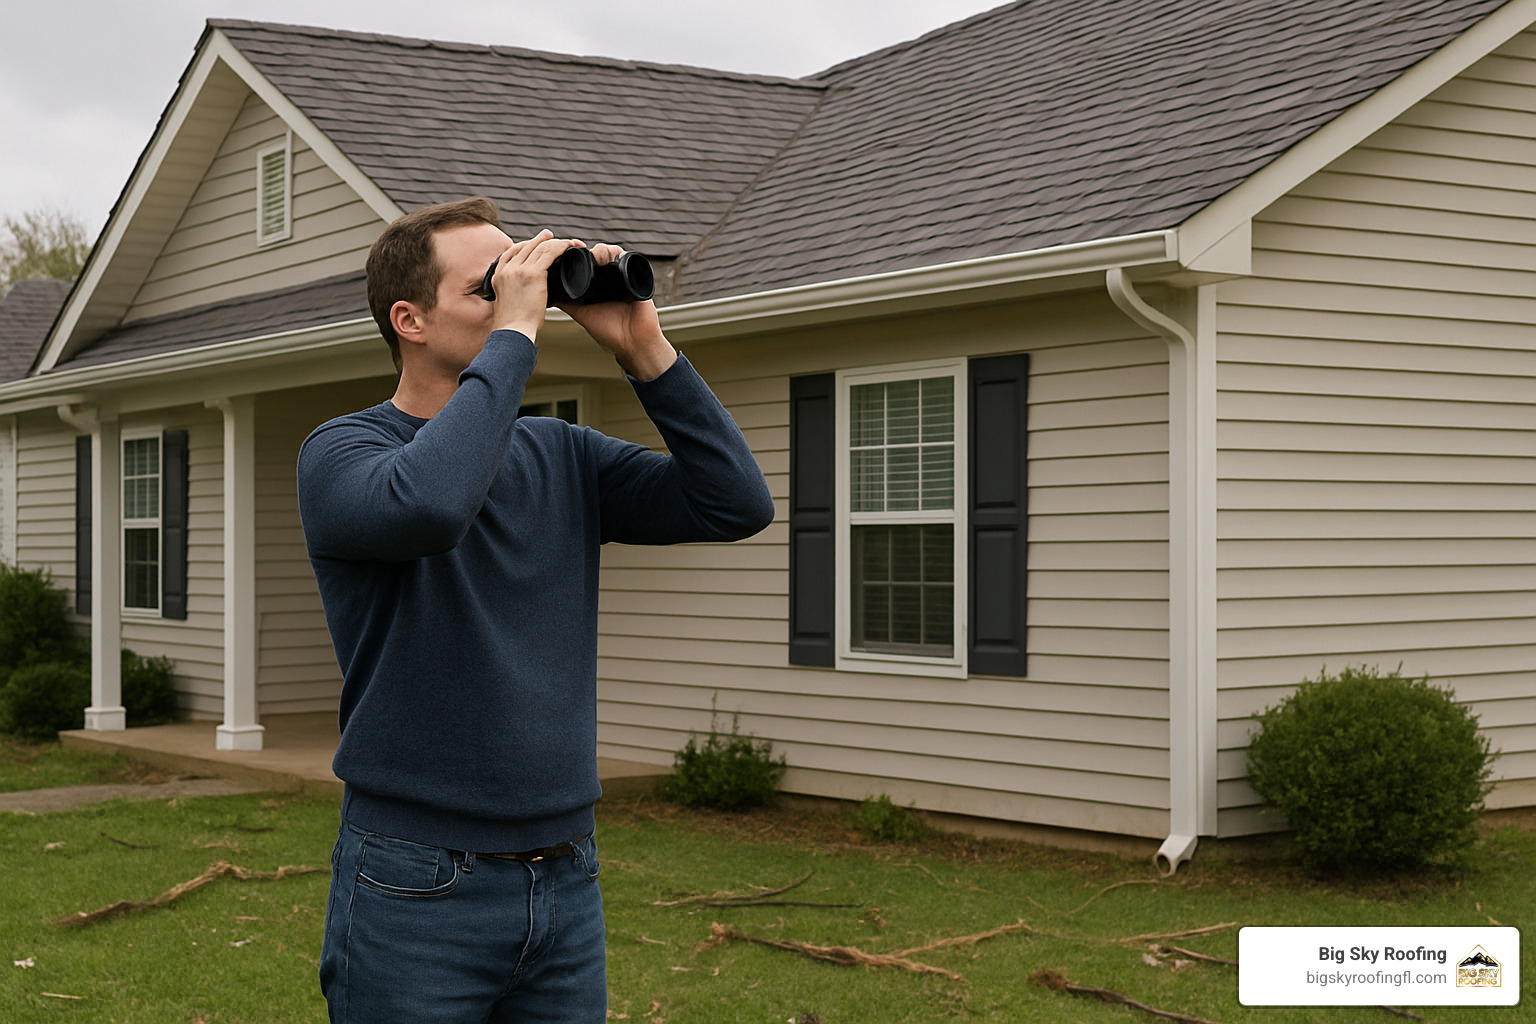
- Binocular check: Use binoculars to inspect from ground level
- Attic examination: Look for water stains, light penetration, or wet insulation
- Document everything: Take clear photos of all damage for insurance
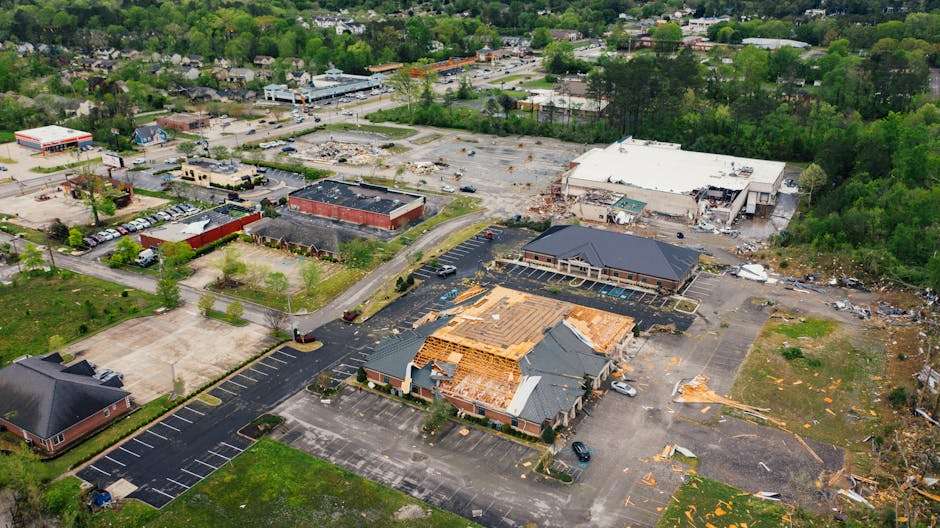
Living in Sumter, Lake, Citrus, Hernando, Orange, or Marion County means your home faces numerous weather threats throughout the year. From afternoon thunderstorms to hurricane-force winds, your roof often bears the brunt of nature’s fury.
“There’s no good time to find out your roof needs repair — but you may be able to mitigate that pain by routinely checking your roof for damage after severe weather,” notes roofing experts who’ve seen countless preventable disasters.
The challenge? Many homeowners don’t realize they have roof damage until it’s too late — when water stains appear on ceilings or mold develops in the attic. By then, what might have been a simple repair becomes a costly replacement.
This guide will walk you through a comprehensive inspection process that doesn’t require climbing onto your roof. You’ll learn to identify common types of storm damage, document problems properly for insurance claims, and know when to call in professionals.
Quick look at how to check for roof damage after a storm:
– can i claim for storm damage to my roof
– wind damage roof
– wind damage roof restoration
Storm Damage 101: Know What You’re Looking For
Ever experienced that moment when beautiful Florida sunshine suddenly gives way to dark clouds and howling winds? In Central Florida, our weather can change in a heartbeat, and your roof often takes the brunt of nature’s mood swings.
“Look, I get it; no one wants to experience roof damage. Unfortunately, things happen that are out of our control,” shares one of our veteran inspectors who’s seen it all across Sumter, Lake, Citrus, Hernando, Orange, and Marion counties over the past 25 years.
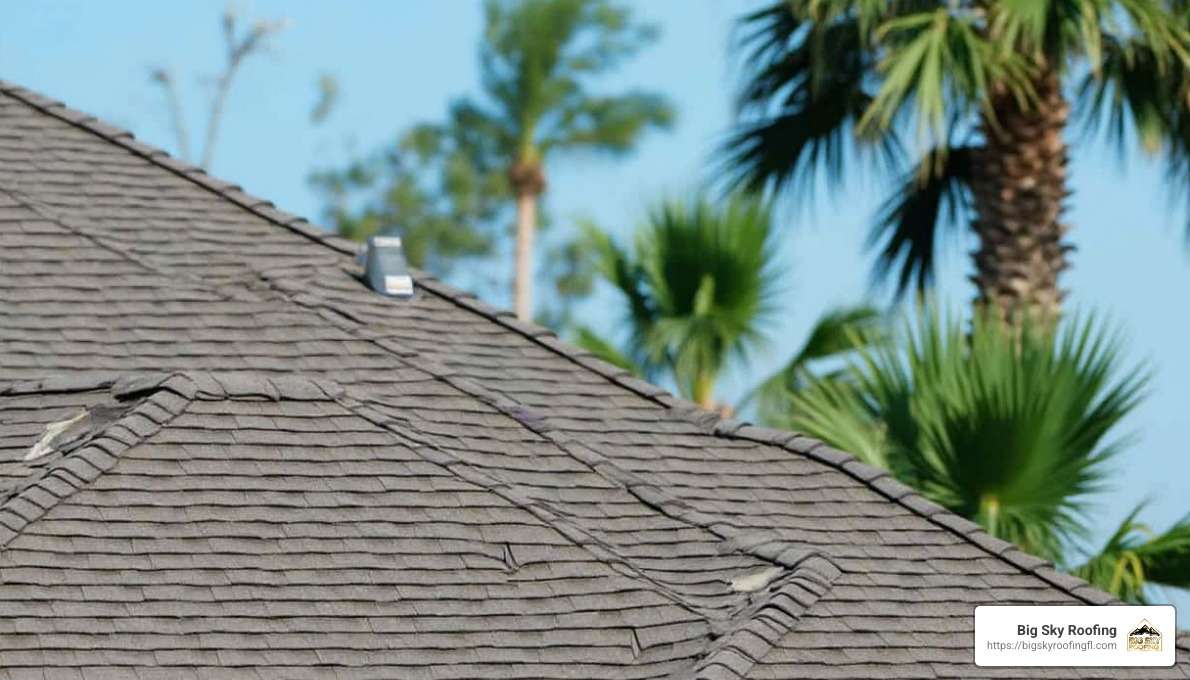
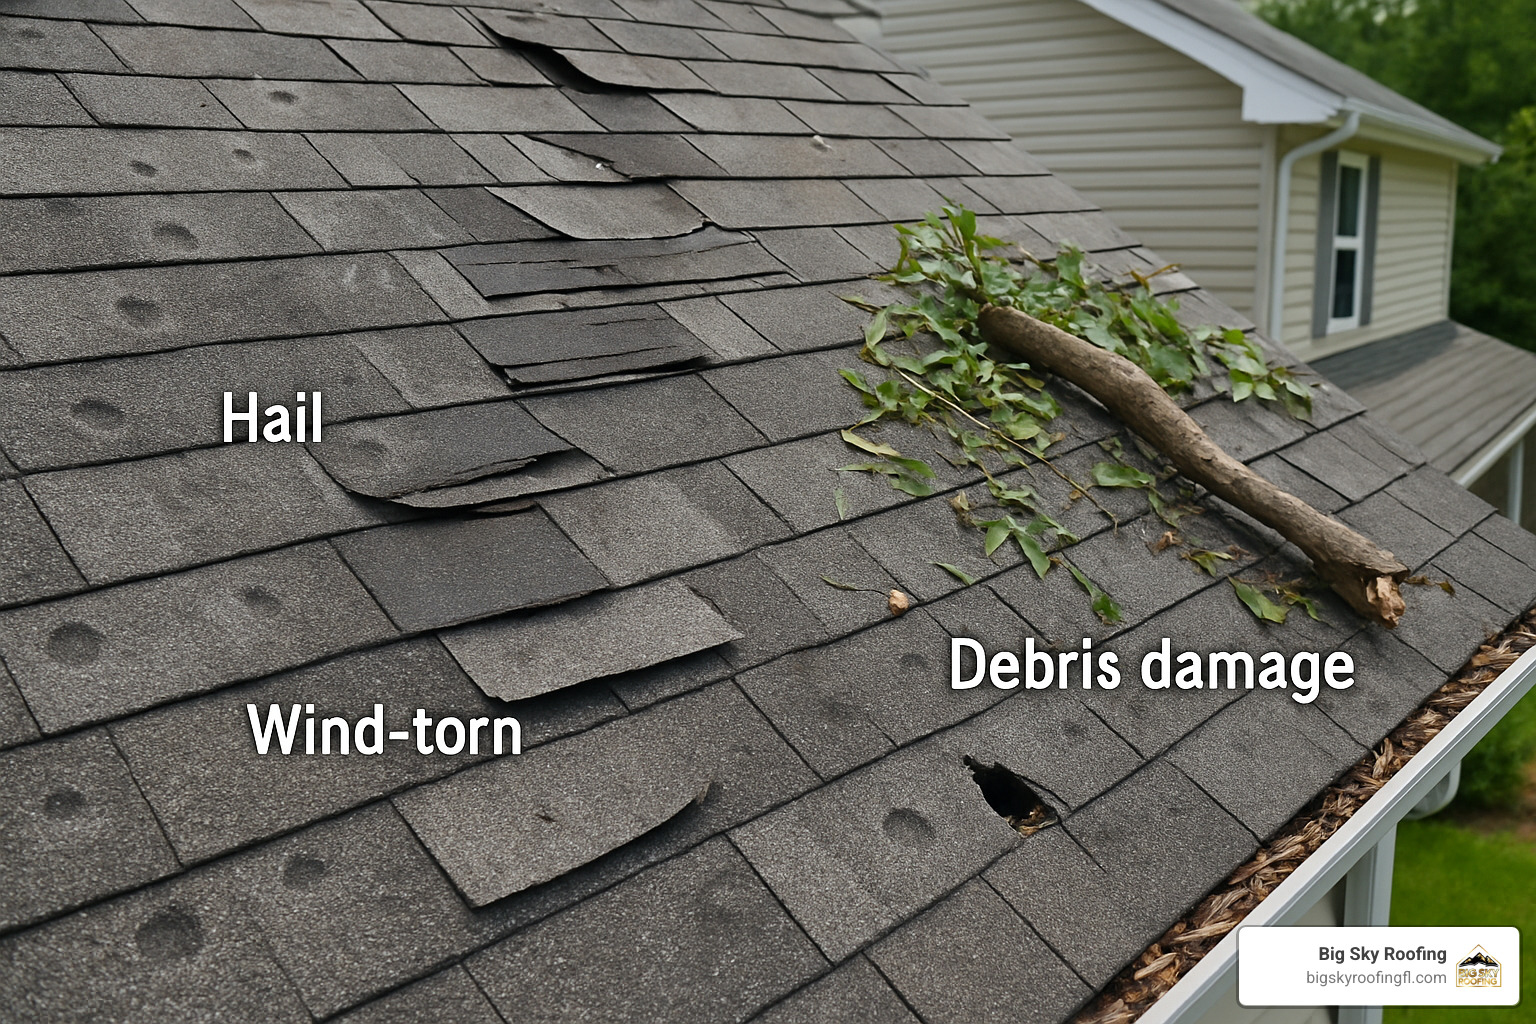
When it comes to how to check for roof damage after a storm, first you need to understand what you’re actually looking for:
Wind damage begins whispering its presence around 45 mph, with shingles starting to lift slightly at their edges. At 50+ mph, those whispers become shouts as shingles tear away completely. When hurricane-force winds above 70 mph hit, they can cause devastating structural damage that goes beyond just the surface materials.
Hail damage leaves a distinctive calling card – random, scattered impacts with no discernible pattern. From tiny pea-sized ice pellets to frightening softball-sized monsters, hailstones strip protective granules from asphalt shingles, crack clay tiles, and leave dents in metal roofing that compromise your home’s protection.
Rain damage might seem straightforward, but it’s often sneaky. Heavy downpours find every vulnerability, especially when wind has already loosened or damaged your roofing materials, creating entry points for water that might not show up inside until days later.
Debris damage happens when those beautiful oak trees in your yard suddenly become weapons. Broken branches, torn limbs, and even your neighbor’s unsecured patio furniture can become dangerous projectiles, puncturing or scraping your roof’s protective surface.
According to research from the Insurance Institute for Business & Home Safety, roof damage represents a significant portion of insurance claims. Their studies reveal something remarkable – proper maintenance and quick post-storm inspections can extend your roof’s life by up to 25%!
Hail vs. Wind: Spot the Difference
When it comes to insurance claims, knowing the difference between hail and wind damage isn’t just interesting trivia – it could mean thousands of dollars in your pocket.
Hail leaves behind circular bruise-like marks where granules have been knocked away from shingles. These impacts follow no pattern or direction, appearing randomly across your roof. You might notice soft spots that feel like a bruised apple when pressed gently, or small dark circles where protective granules have vanished. Metal elements like flashing, vents, and gutters often sport telling dents.
Wind damage tells a different story – it creates lifted or creased shingles that roofing pros often describe as looking like “hamburger patties.” You’ll notice missing sections, particularly along edges, corners, and ridgelines where wind forces are strongest. Torn or split shingles typically follow the wind’s direction, creating a visible pattern. And don’t be surprised to find tree debris deposited in specific areas.
A Lake County homeowner recently told us: “I thought I only had wind damage until my inspector pointed out the telltale circular marks from hail. Without that knowledge, I might have missed half my legitimate insurance claim.”
Normal Wear vs. True Storm Damage
Insurance adjusters are trained to spot the difference between normal aging and storm damage. You should be too.
Normal wear appears as uniform fading or discoloration across your entire roof. You’ll see gradual, evenly distributed granule loss, perhaps some algae or moss growth (especially common in humid Florida), minor curling at shingle edges from years of sun exposure, and slow-developing blisters or cracks.
Manufacturing defects have their own signature – perfectly straight lines of damage, consistent patterns of failure, problems appearing shortly after installation, or issues limited to one batch of materials.
True storm damage, however, appears suddenly after a specific weather event. It’s concentrated in areas that faced the storm’s fury, shows fresh, sharp-edged damage rather than weathered deterioration, and often comes with collateral damage to gutters, siding, and other exterior elements.
“Insurance companies will often try to attribute damage to wear and tear rather than storm events,” one of our experienced inspectors notes. “Knowing the difference and documenting it properly can be the difference between a denied claim and a full roof replacement.”
When you’re learning how to check for roof damage after a storm, understanding these distinctions isn’t just helpful – it’s essential for protecting your home and your wallet from further damage down the road.
How to Check for Roof Damage After a Storm (Ground-to-Sky Method)
After the dark clouds roll away and it’s safe to venture outdoors, our Ground-to-Sky Method gives you a safe, systematic way to check your roof without unnecessary risks. Think of it as your post-storm reconnaissance mission—gathering intelligence before deciding your next move.
“I always tell homeowners in Sumter County that even small signs of damage deserve professional attention,” says one of our veteran inspectors at Big Sky Roofing. “But knowing what you’re looking at first can help you communicate better with your insurance company and roofing professionals.”
Step 1 – Ground Perimeter Walk-Around: How to Check for Roof Damage After a Storm
Start with your feet firmly planted on the ground—this is where safety and smart inspection begin.
Your mission begins with a careful circle around your property. Look up toward your roofline, searching for missing or damaged shingles that might be flapping in the breeze. Those fallen pieces of roofing material scattered across your yard? They’re like puzzle pieces that tell a story about what’s happening overhead.
Pay attention to your gutters and downspouts too. “I remember a Lake County homeowner who didn’t think the storm was that bad until we showed her the dented gutters and downspouts,” recalls our inspection team lead. “Where there’s enough force to dent metal gutters, there’s almost always roof damage hiding somewhere.”
Don’t overlook collateral damage—those dents in your air conditioning unit, mailbox, or vinyl siding are like warning flares. They signal that hail or debris had enough force to cause impact damage, which likely affected your roof as well.
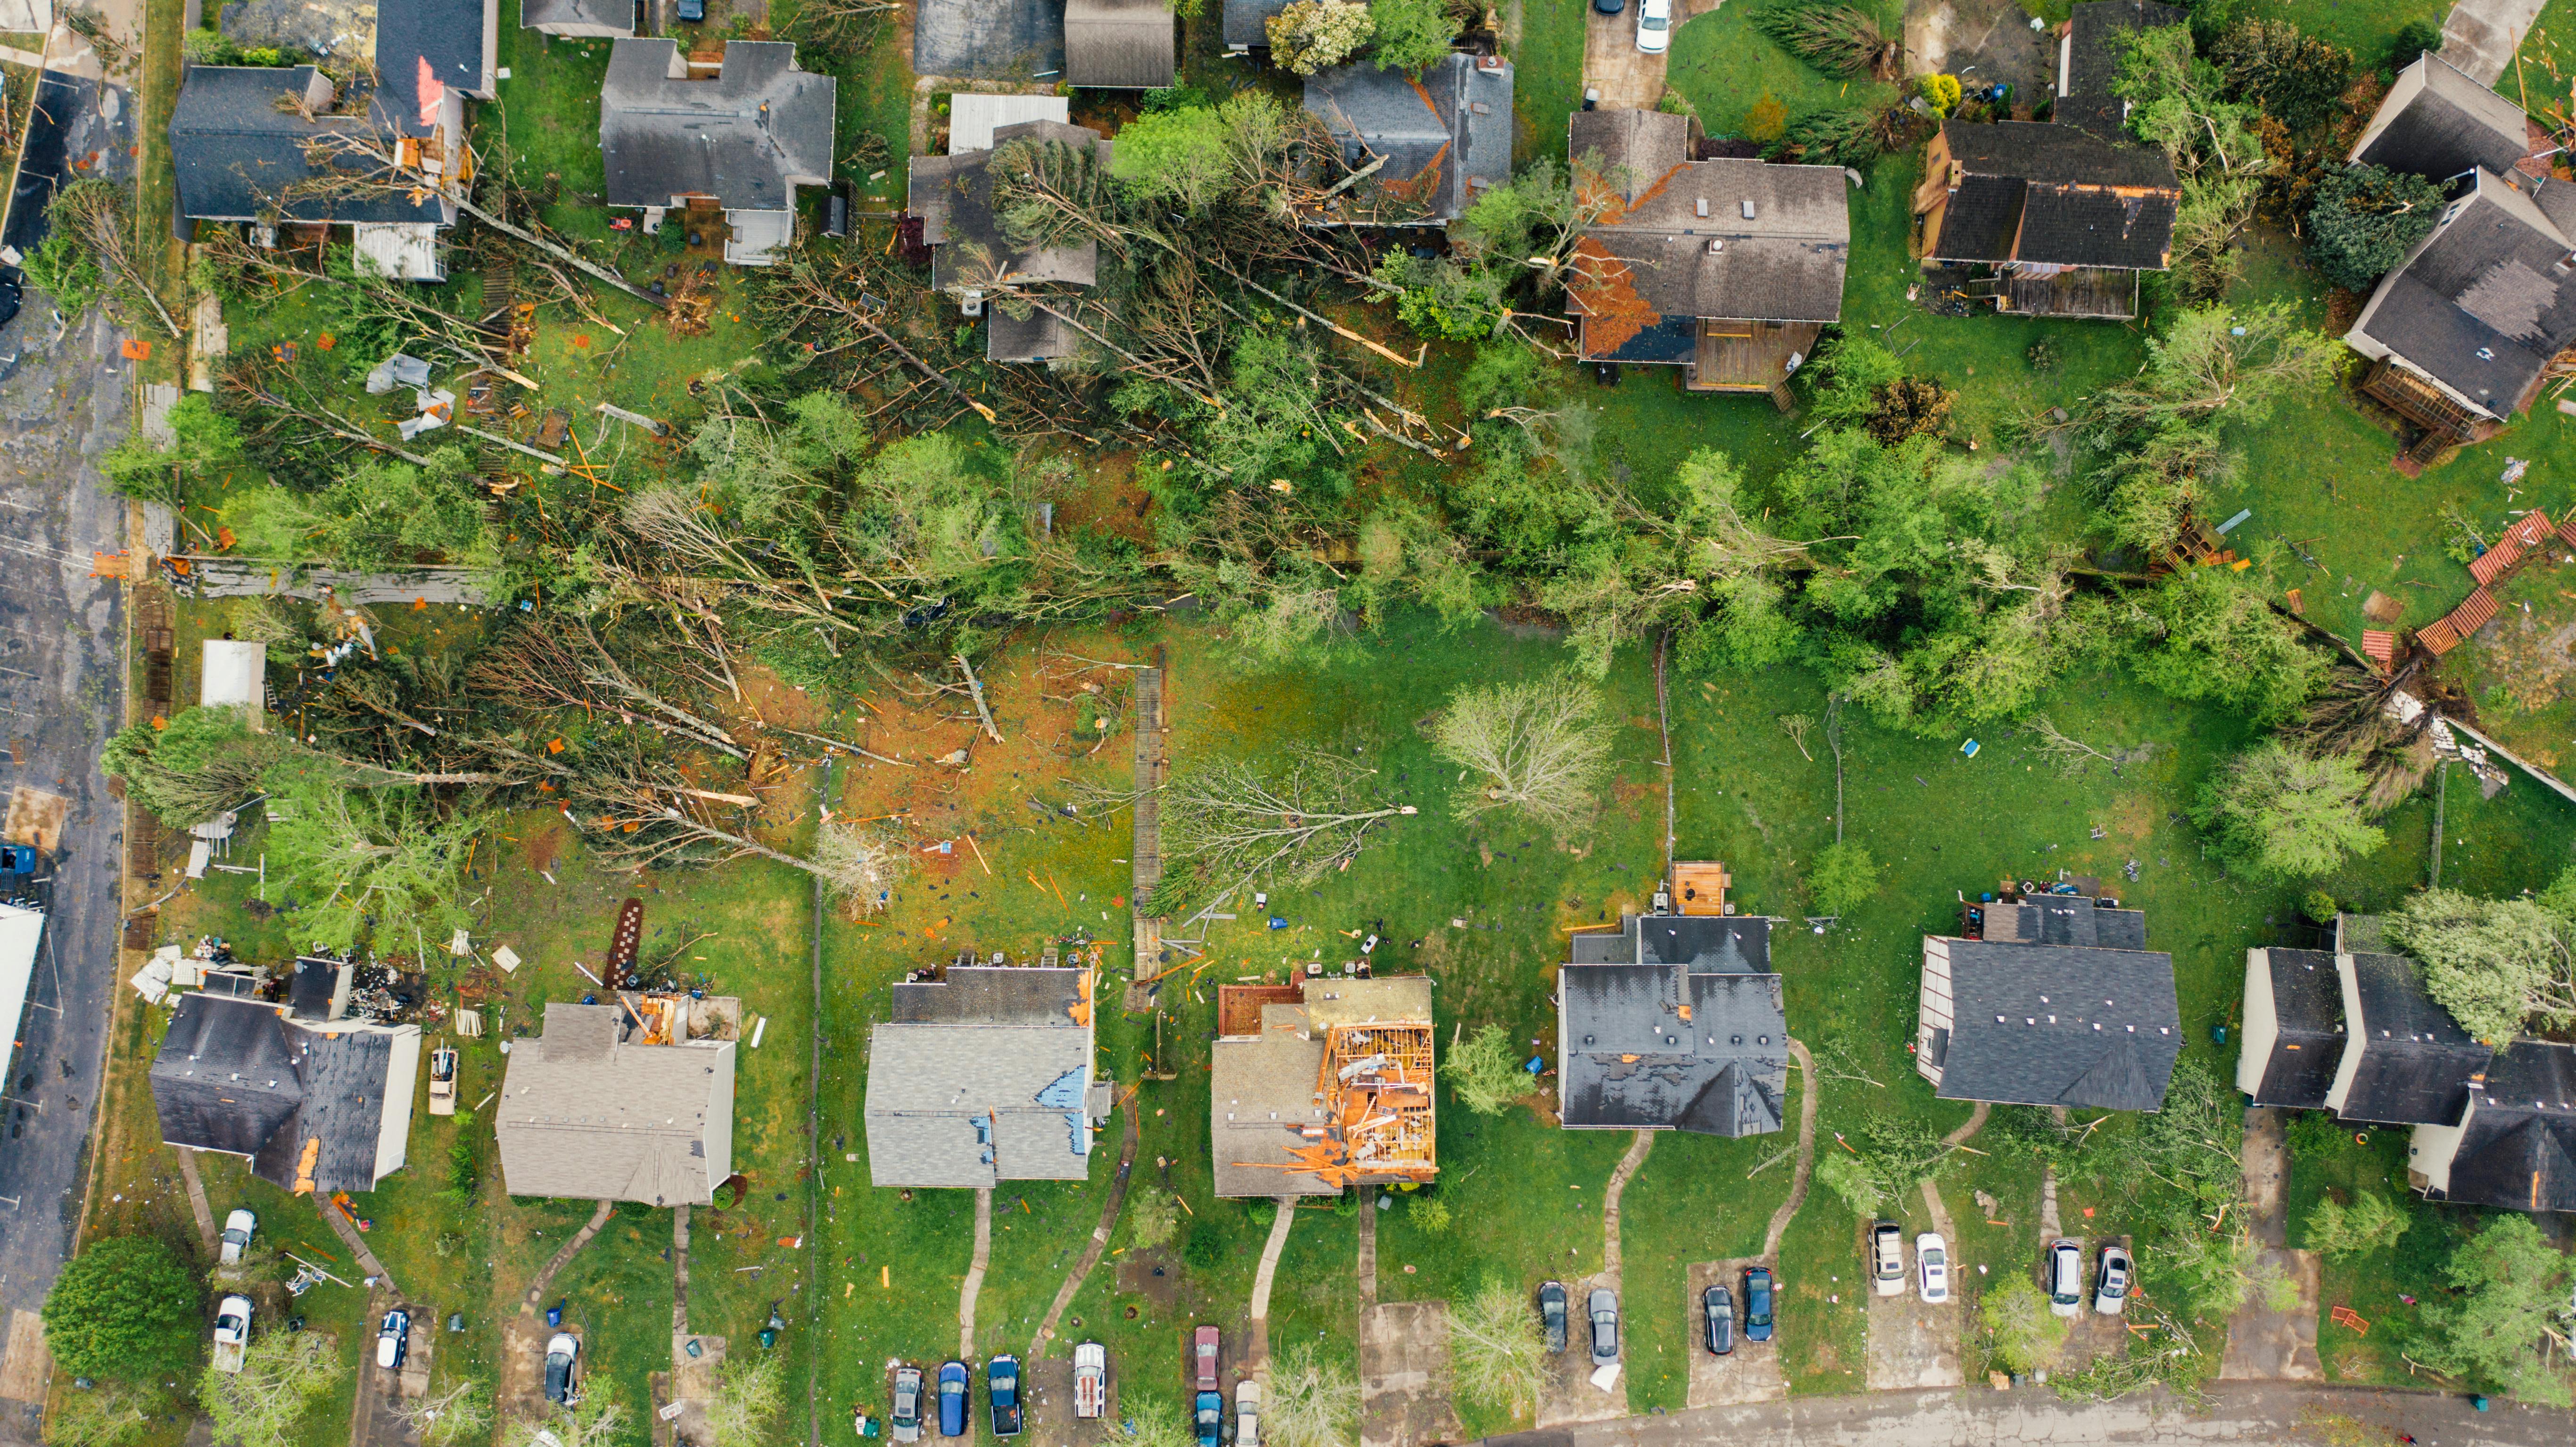
Take a moment to glance at your neighbors’ homes too. If folks in Marion County or Orange County on your street are getting roof inspections, it might be wise to follow suit. Storms don’t typically single out one home while sparing another.
Step 2 – Ladder & Zoom-Lens Peek: How to Check for Roof Damage After a Storm
If you’re comfortable with heights and have a sturdy ladder, you can get a closer look without actually walking on your roof (which we don’t recommend after a storm).
Ladder safety is non-negotiable. Always maintain three points of contact, which means both feet and one hand—or both hands and one foot—should be touching the ladder at all times. Consider using a phone strap or helmet camera to keep your hands free for climbing. And remember, your gutters aren’t handrails—they’re not designed to support your weight.
From your ladder vantage point, examine the flashing around chimneys and vents for tears or separation. Check for shingles that are curling up like rolled newspapers or lifting away from the roof surface. Any exposed underlayment—that black or gray material beneath your shingles—is a red flag that needs immediate attention.
“Not everyone feels safe on a ladder, and that’s completely understandable,” says our Citrus County team leader. “Binoculars or a smartphone with a good zoom lens can be your best friend in these situations. And for our Hernando County customers, we often offer drone inspections for a truly safe bird’s-eye view.”
Step 3 – Attic Reconnaissance
Your attic is like the canary in the coal mine for roof problems—it often shows signs of trouble before water starts dripping through your ceiling.
Choose your timing wisely. Checking during or shortly after rainfall makes leaks more obvious, while bright daylight might reveal pinpoints of light coming through damaged areas. Either way, grab your flashlight, put on a mask for dust protection, and don some gloves before you venture up.
As you move through the attic space, shine your light along the underside of the roof decking. Water stains appear as dark discolorations on wood surfaces. Wet insulation feels damp when compressed between your fingers—a clear sign that moisture has found its way in. A musty odor often precedes visible mold, so trust your nose as much as your eyes.
“One of our customers in Sumter County thought her roof had weathered the storm just fine,” shares our inspection specialist. “But when she checked her attic, she found daylight streaming through a quarter-sized hole near her chimney flashing. That tiny opening could have led to thousands in water damage if left unrepaired.”
Don’t forget to look for signs of uninvited guests. Storms can create entry points for squirrels, raccoons, and other critters looking for shelter. Fresh gnaw marks or nesting materials near new openings suggest you might be hosting wildlife.
Your attic inspection completes the Ground-to-Sky Method, giving you a comprehensive understanding of your roof’s post-storm condition—all without putting yourself in danger on a potentially compromised roof surface.
Material-Specific Checklists & Interior Clues
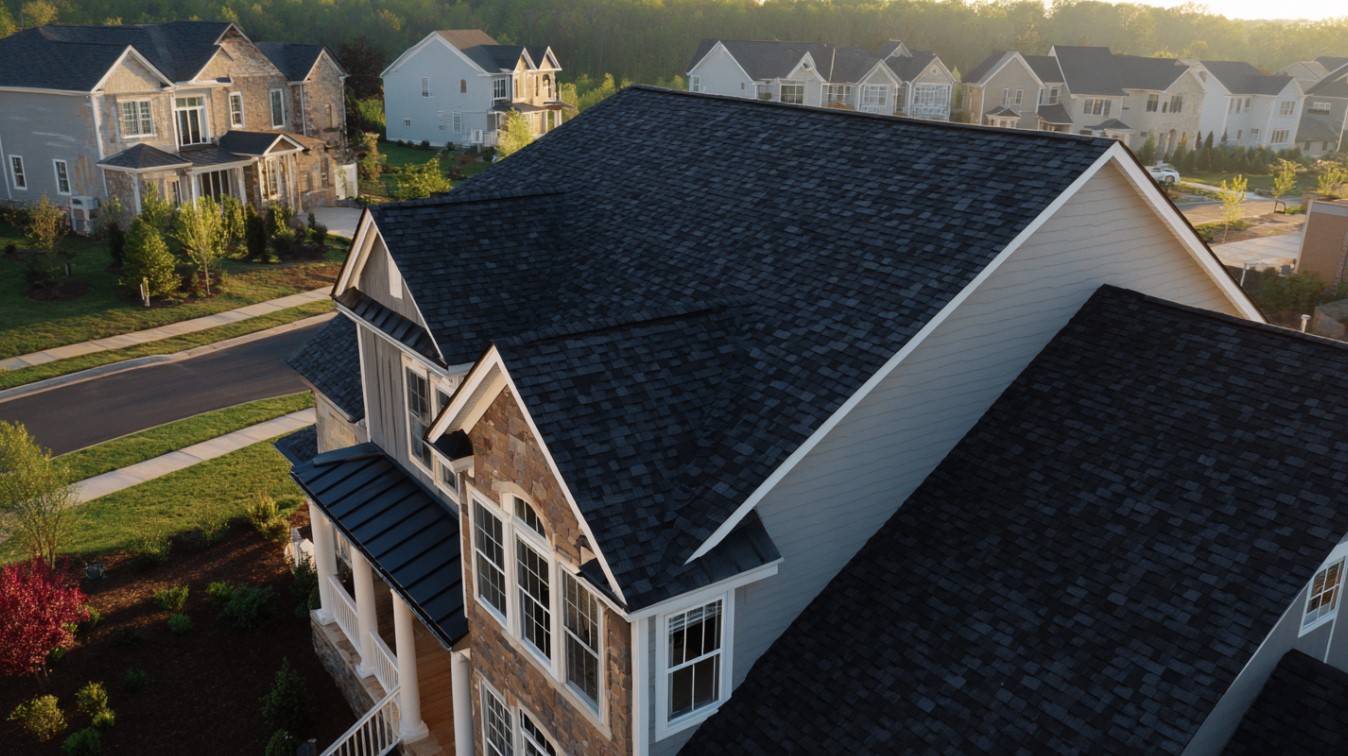
Different roofing materials tell their own unique storm damage stories. Whether you have traditional asphalt shingles or premium metal roofing, knowing the specific warning signs for your roof type can make all the difference in catching problems early.
“When most homeowners think about roofing, they picture asphalt shingles – and for good reason, as they’re the most common type across America,” explains our team at Big Sky Roofing. “But each material has its own particular way of showing when it’s been damaged by Florida’s sometimes fierce weather.”
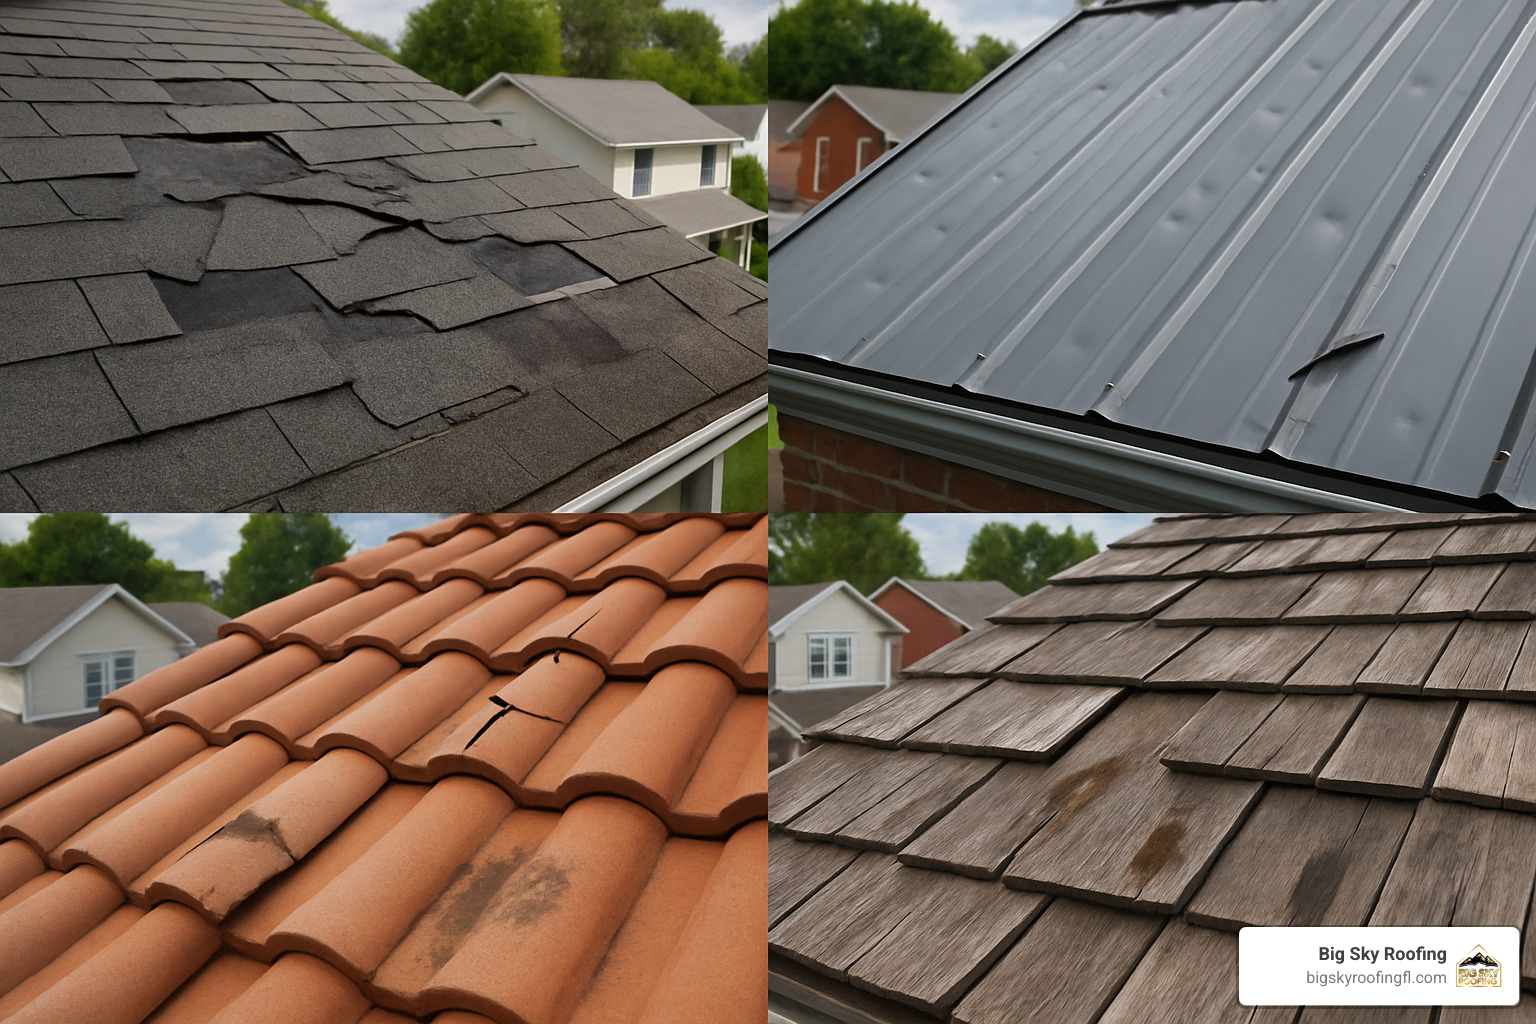
Asphalt-Shingle Red Flags
Asphalt shingles reign supreme across Central Florida homes, and they have their own distinct damage patterns worth watching for. After a storm blows through Sumter or Lake County, take a close look at your gutters – finding what looks like black sand or tiny pebbles is actually a warning sign. These are protective granules that have washed off your shingles, leaving them vulnerable to further damage and rapid aging.
Black bruises on your shingles are another telltale sign of hail impact. These darker spots feel somewhat soft to the touch – similar to pressing on a bruised apple. They indicate areas where the protective granule layer has been compromised, exposing the asphalt beneath to harmful UV rays.
Wind damage often reveals itself through lifted tabs where the adhesive seal between shingles has broken. As one Marion County homeowner finded: “After those 60 mph gusts last summer, I noticed several shingles that looked like they were peeling up at the edges. My inspector explained that once that seal breaks, even a moderate breeze can get underneath and cause more lifting.”
When you spot thin horizontal lines running across sections of your roof, that’s a red flag for significant granule loss along manufacturing seams – often indicating your roof is ready for replacement before the next big storm hits.
Tile & Slate Warning Signs
For homeowners in upscale neighborhoods across Citrus and Orange Counties, tile and slate roofs require a different damage checklist after storms pass through.
Unlike asphalt shingles that might dent, clay and concrete tiles tend to crack or chip when struck by hail or flying debris. Even hairline cracks deserve attention since they create pathways for water to seep underneath.
High winds can cause slipped pieces, shifting tiles out of their proper position and compromising your roof’s ability to shed water effectively. The corners of tiles are particularly vulnerable points, often breaking off entirely during severe weather events.
When tiles become displaced or broken, the waterproof underlayment becomes exposed to damaging sunlight. “Tile roofs have tremendous longevity and weather resistance,” notes our team, “but their damage patterns can be subtler and require a more trained eye to spot properly.”
Slate roofing, though less common in Florida, may display small impact divots or chips where hail has struck – these seemingly minor imperfections can significantly shorten a slate roof’s lifespan if not addressed promptly.
Metal & Flat Roof Indicators
As metal and flat roofing gain popularity across Hernando, Orange, and Marion counties, homeowners should be aware of their unique damage signatures after storms.
Metal roofing typically shows hail damage as visible dents and dings that stand out against the otherwise smooth surface. After severe weather, look for unusual waviness in metal panels – often called “oil-canning” – which indicates stress from wind or impact forces.
Storms can work fasteners loose over time, so check for any screws or clips that appear to be backing out. Also inspect for separated seams where panels join together, as these gaps create entry points for water. Any scratches or scuffs that penetrate the protective coating deserve attention since they can lead to premature rusting.
For flat roofs, standing water that remains more than 48 hours after rainfall indicates drainage problems that often worsen after storms. Look for bubbles or blisters in the membrane, which suggest trapped moisture underneath. Storm debris frequently causes tears or punctures in flat roofing materials, so inspect carefully after high winds.
“Metal roofs can last 50+ years with proper care,” shares one of our inspectors, “but that doesn’t mean they’re invincible to Florida’s storm season.”
Hidden Interior Signals
Sometimes your ceiling speaks first about roof damage. Interior warning signs often appear before you notice anything wrong from outside.
Water stains on ceilings or walls are the most obvious indicators of a roof leak. Fresh stains might still feel damp to the touch, while older ones typically develop yellowish or brownish rings around the edges. After major storms roll through Lake or Sumter County, take a few minutes to scan your ceilings with a flashlight.
Watch for paint that bubbles or peels, especially around windows or on top-floor ceilings. This often signals moisture intrusion from above. Similarly, drywall that feels soft when you press gently against it suggests ongoing water problems that need immediate attention.
An unexpected spike in your energy bills following a storm could indicate compromised roof insulation from water damage. As insulation becomes wet, it loses its effectiveness, forcing your HVAC system to work harder.
Perhaps the subtlest sign is a persistent musty odor in upper areas of your home. As one Citrus County homeowner told us: “I kept noticing this strange smell in my hallway after a thunderstorm. There were no visible leaks, but when the inspector checked the attic, he found a small section of wet insulation from a cracked tile I never would have spotted from the ground.”
How to check for roof damage after a storm involves more than just looking up from your yard. These material-specific warning signs and interior clues can help you catch problems early, potentially saving thousands in preventable damage to your Central Florida home.
Document, Claim, Repair: Your Post-Inspection Action Plan
After finding potential roof damage, taking swift action can save you thousands in additional repairs and ensure your insurance claim goes smoothly. The hours and days following your inspection are critical.
“The biggest mistake I see homeowners make is waiting too long to document and report damage,” says our experienced team leader at Big Sky Roofing. “Those first photos and notes can make or break your insurance claim.”
Creating a thorough damage record should be your first priority. Grab your smartphone and capture clear, well-lit photos from multiple angles – wide shots showing the entire affected area and close-ups highlighting specific damage points. Don’t forget to record video where appropriate, especially if you notice active leaks or movement in damaged materials. Always note the date and time of both the storm and your inspection.
Keep all your documentation organized in a dedicated folder, whether digital or physical. This simple step can save hours of frustration when working with adjusters later.
Sometimes damage requires immediate attention to prevent your home from suffering further harm. In these cases, temporary repairs become necessary. Securely cover holes or damaged sections with waterproof tarps (without causing additional damage), place buckets under active leaks, and move valuables away from vulnerable areas.
“Save every receipt from emergency repairs,” advises our claims specialist. “Most policies cover reasonable expenses for preventing further damage, but you’ll need proof of what you spent.”
Contacting your insurance company promptly is crucial, but take a moment to review your policy first. Understanding your coverage before making that call helps you communicate more effectively. Most Florida policies require notification within a specific timeframe – typically 6-24 months for hail damage, though this varies by carrier.
When you call, request an adjuster visit as soon as possible and be prepared to share your documentation. Take detailed notes during all conversations with insurance representatives – these records can prove invaluable if disputes arise later.
“Having a professional roofing contractor present during the adjuster’s inspection often results in a more accurate assessment,” notes our claims specialist who has helped hundreds of homeowners across Sumter, Lake, Citrus, Hernando, Orange, and Marion counties. “They can point out damage that might otherwise be overlooked.”
Selecting the right contractor for repairs is perhaps your most important decision. Choose a licensed, insured roofing company with local experience and verifiable credentials. Get multiple estimates if time permits, and always ask about their experience working with insurance claims.
Be particularly wary of “storm chasers” – out-of-town contractors who appear immediately after severe weather. While some may be legitimate, many disappear after collecting deposits, leaving homeowners with substandard repairs and no recourse.
For more comprehensive guidance on navigating insurance claims, visit our detailed guides on Can I Claim for Storm Damage to My Roof? and Storm Damage Roofing.
Insurance companies generally require you to take reasonable steps to prevent further damage after a storm. Failing to do so could jeopardize your claim and leave you paying out-of-pocket for what should have been covered repairs.
Do’s, Don’ts & FAQs
When the storm clouds finally roll away, knowing exactly what steps to take—and which ones to avoid—can make all the difference in how to check for roof damage after a storm. Whether you’re in Sumter County facing summer thunderstorms or dealing with hurricane aftermath in Marion County, these guidelines will keep you safe and your roof protected.
Do’s and Don’ts Snapshot
The moments after a storm are crucial, but safety should never take a backseat to urgency. Our team at Big Sky Roofing has seen too many preventable accidents over our 25 years serving Central Florida.
“I always tell homeowners—your roof has weathered the storm, now make sure you weather the inspection safely,” says one of our veteran inspectors with a smile. “No roof repair is worth a trip to the emergency room.”
DO wait until the storm has completely passed before heading outside. Those dark clouds in the distance might be bringing another round of severe weather your way.
DO wear proper safety gear if you’re using a ladder—a helmet to protect your head, non-slip shoes for traction, and work gloves for handling debris. The extra minute it takes to gear up properly could save you hours in the hospital.
DO document everything thoroughly with clear photos from multiple angles. Your smartphone camera can be your best ally when filing an insurance claim.
DO apply temporary protection like tarps if you find significant damage. This prevents further water intrusion that could turn a simple repair into a major restoration.
DO reach out to a licensed, local roofing professional like Big Sky Roofing rather than attempting complex inspections yourself. We know exactly what to look for and how to spot hidden damage.
DON’T attempt to walk on a roof that shows any signs of sagging or structural weakness. That creaking sound isn’t just your imagination—it’s your roof warning you to stay off.
DON’T hire traveling “storm chasers” who appear in your neighborhood after severe weather. These out-of-town contractors often disappear once they’ve collected payment, leaving you with subpar repairs and no warranty support.
DON’T sign contracts or agreements before consulting with your insurance company. Some documents might waive important rights or commit you to specific contractors.
DON’T tackle repairs beyond your comfort zone or skill level. What starts as a simple DIY fix can quickly become complicated when dealing with roof systems.
DON’T postpone addressing even seemingly minor damage. That tiny leak can become a major problem with the next rainfall, potentially causing thousands in interior damage.
For situations requiring immediate professional assistance, our Emergency Roofing Services in Central Florida provide rapid response when you need it most.
Frequently Asked Questions about Roof-Damage Checks
What safety gear should I use during a DIY inspection?
Ground-level inspections require minimal equipment—just sturdy footwear with good traction. However, if you’re planning to use a ladder (which we recommend only for those comfortable with heights), proper safety gear becomes essential.
“I would say ‘Don’t try this at home,’ but how else are you going to get on your roof?” jokes one of our inspectors. “Seriously though, roof inspection isn’t for everyone—it requires an adventurous homeowner with proper safety equipment.”
A properly fitted helmet or hard hat can protect against falling debris. Non-slip, closed-toe shoes provide crucial traction on ladder rungs. Work gloves shield your hands when clearing small debris, while safety glasses protect your eyes from falling particles. For those rare instances when roof access is necessary, a safety harness provides essential fall protection—though we generally recommend leaving roof-walking to professionals with proper training and equipment.
How soon must I file an insurance claim after hail in Florida?
Most Florida insurance policies require notification of hail damage within 6-24 months of the event, but don’t mistake this timeline for an invitation to delay. The sooner you file, the smoother the process typically goes.
“Most roofing companies won’t charge for a hail inspection,” notes our team. “Definitely get it inspected, but avoid filing a claim for the sake of filing a claim if no significant damage is found.”
Prompt filing demonstrates you’ve taken reasonable care of your property—something insurance companies look for when evaluating claims. Moreover, roof damage rarely improves with time; small issues can worsen significantly within weeks, especially during Florida’s rainy season. If multiple storms hit your area in one season (as often happens in Lake and Orange counties), delayed reporting makes it difficult to attribute damage to specific events, potentially complicating your claim.
Can I rely on neighborhood damage as proof for my insurer?
While seeing your neighbors in Citrus or Hernando County getting new roofs might alert you to potential damage on your own home, insurance adjusters evaluate each property individually. Neighborhood damage supports your claim but isn’t sufficient evidence on its own.
“If you notice your neighbors have roof issues after a storm, chances are your property may have suffered as well,” explains our team at Big Sky Roofing. “But you’ll still need specific documentation of your own roof’s condition.”
Knowing that nearby properties sustained damage establishes that a significant weather event affected your area. It may indicate the type and extent of damage to expect on your own roof. This awareness can help you conduct a more thorough inspection, potentially identifying issues you might otherwise overlook. Some insurers may also be more responsive when they see multiple claims from the same neighborhood, as it validates the severity of the storm event.
Conclusion
Living in Central Florida means your roof will face numerous weather challenges throughout its lifetime. From the powerful afternoon thunderstorms common in Sumter, Lake, Citrus, Hernando, Orange, and Marion counties to the occasional hurricane threat, knowing how to check for roof damage after a storm is an essential homeowner skill.
The skies may clear and the winds may calm, but the aftermath of a storm can leave lasting impacts on your home’s first line of defense. As we’ve seen throughout this guide, prompt inspection and action can prevent minor issues from becoming major expenses. That small leak you barely notice today? Left unaddressed, it can lead to structural damage, mold growth, and even health problems for your family.
“I’ve seen too many homeowners wait until water is literally dripping through their ceiling before they call us,” shares one of our veteran inspectors. “By then, what could have been a simple repair becomes a costly nightmare.”
Remember these key takeaways from our guide:
Safety first—never risk personal injury to inspect your roof. Those binoculars and ground-level checks are often sufficient to spot major issues.
Use the Ground-to-Sky Method for a thorough assessment that keeps your feet firmly planted on terra firma whenever possible.
Document everything with clear photos and detailed notes. Your future self (and your insurance adjuster) will thank you.
Address problems quickly to prevent further damage. Even small issues can cascade into major headaches during the next rainfall.
Partner with professionals who understand Florida’s unique roofing challenges. Our tropical climate demands specialized knowledge and materials.
At Big Sky Roofing, we’ve been serving Central Florida homeowners for over 25 years with the kind of craftsmanship and care we’d want for our own families. Our team of licensed and insured professionals specializes in storm damage assessment, insurance claim assistance, and quality repairs that stand the test of time—and the next storm.
“Your roof protects everything you value,” notes our founder. “It deserves proper attention, especially after Mother Nature tests its limits.”
For comprehensive roofing services, including free storm damage assessments, visit our full roofing services page. Our one-visit solution approach means we can often diagnose, document, and begin addressing your roof issues in a single appointment—saving you time and preventing further damage.
Don’t wait until that small leak becomes a deluge. Contact Big Sky Roofing today and stay storm-ready year-round, knowing your home’s crown is prepared to weather whatever Florida’s skies may bring!